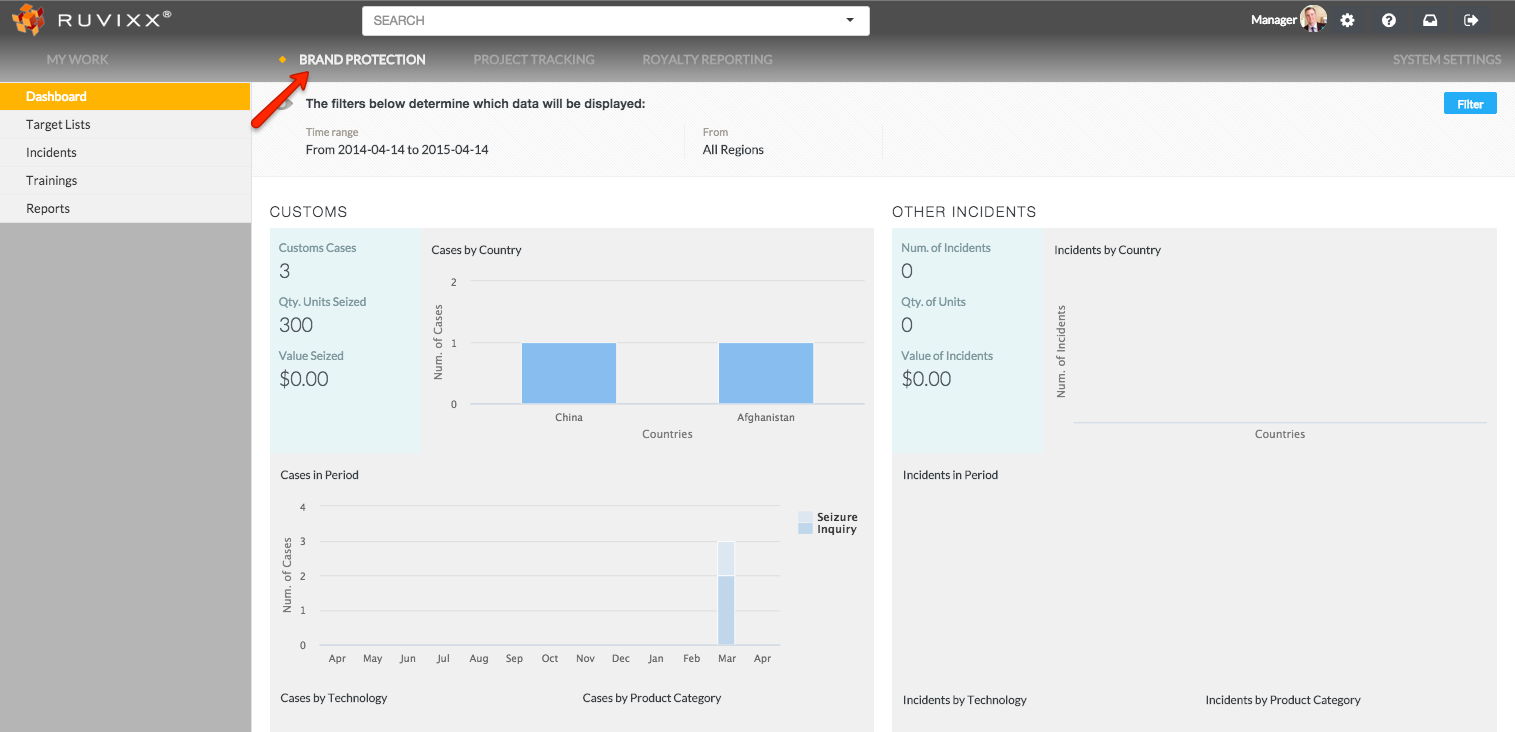
- Click the Brand Protection button on top menu bar
- Click on Incidents on the left hand navigation pane
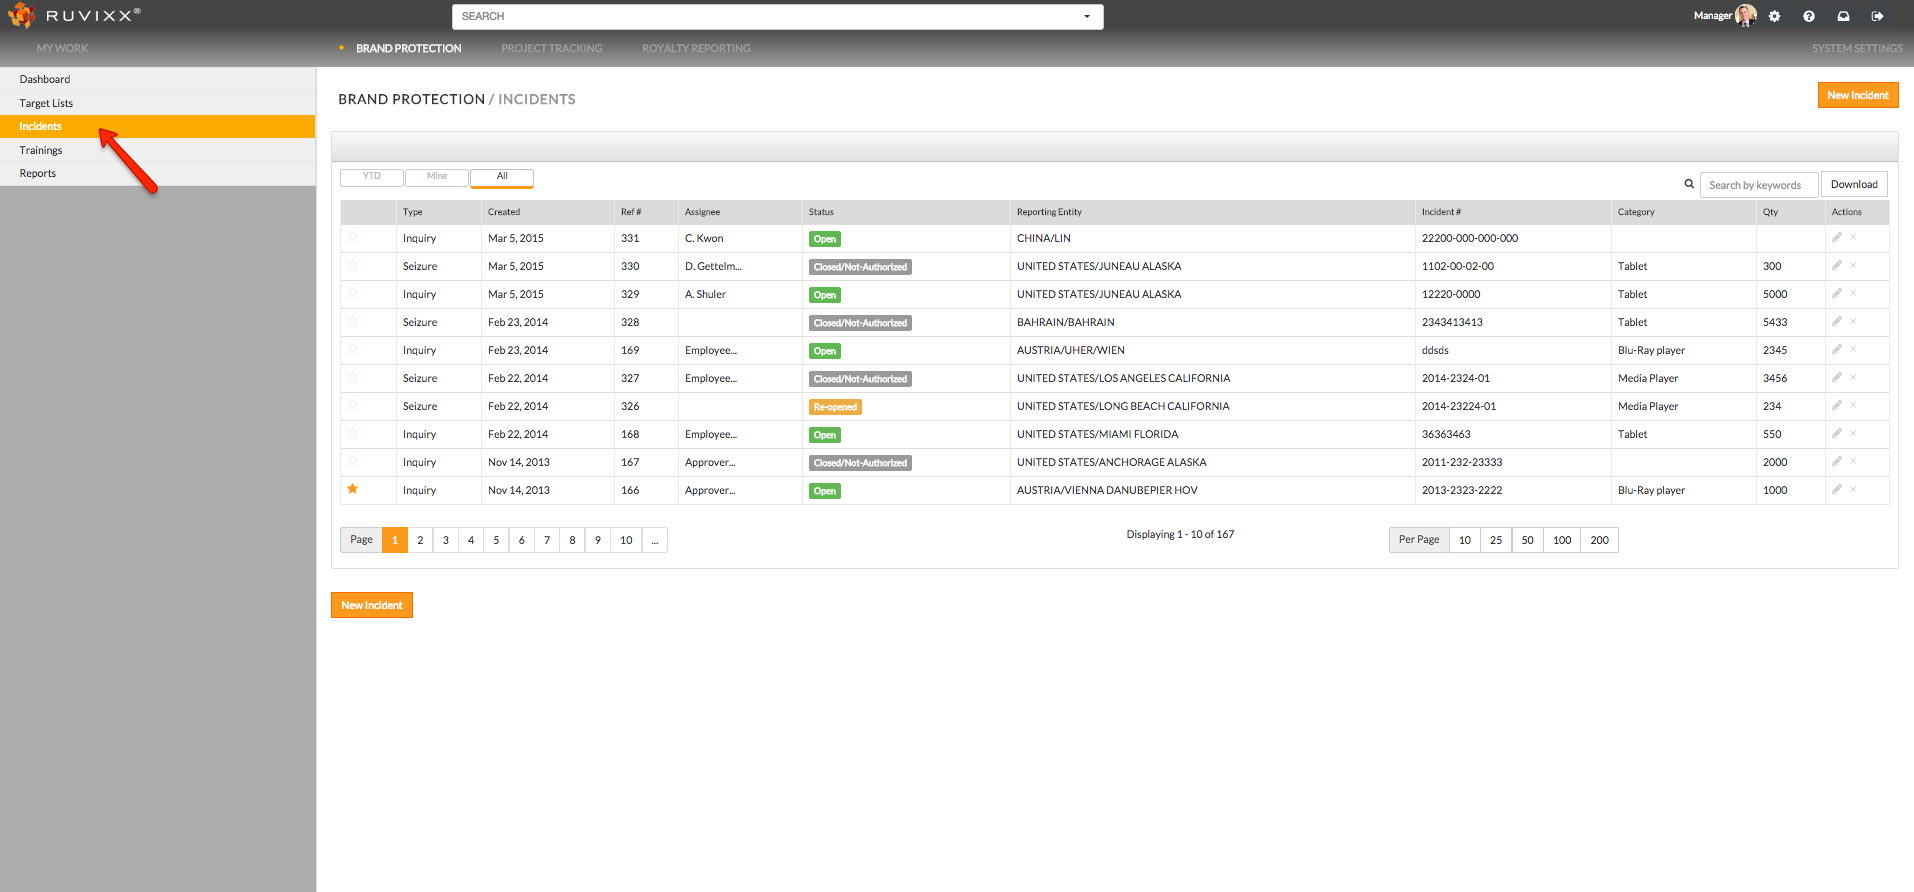
- To add a new Incident, click on the New Incident button on either the bottom left or top right corner

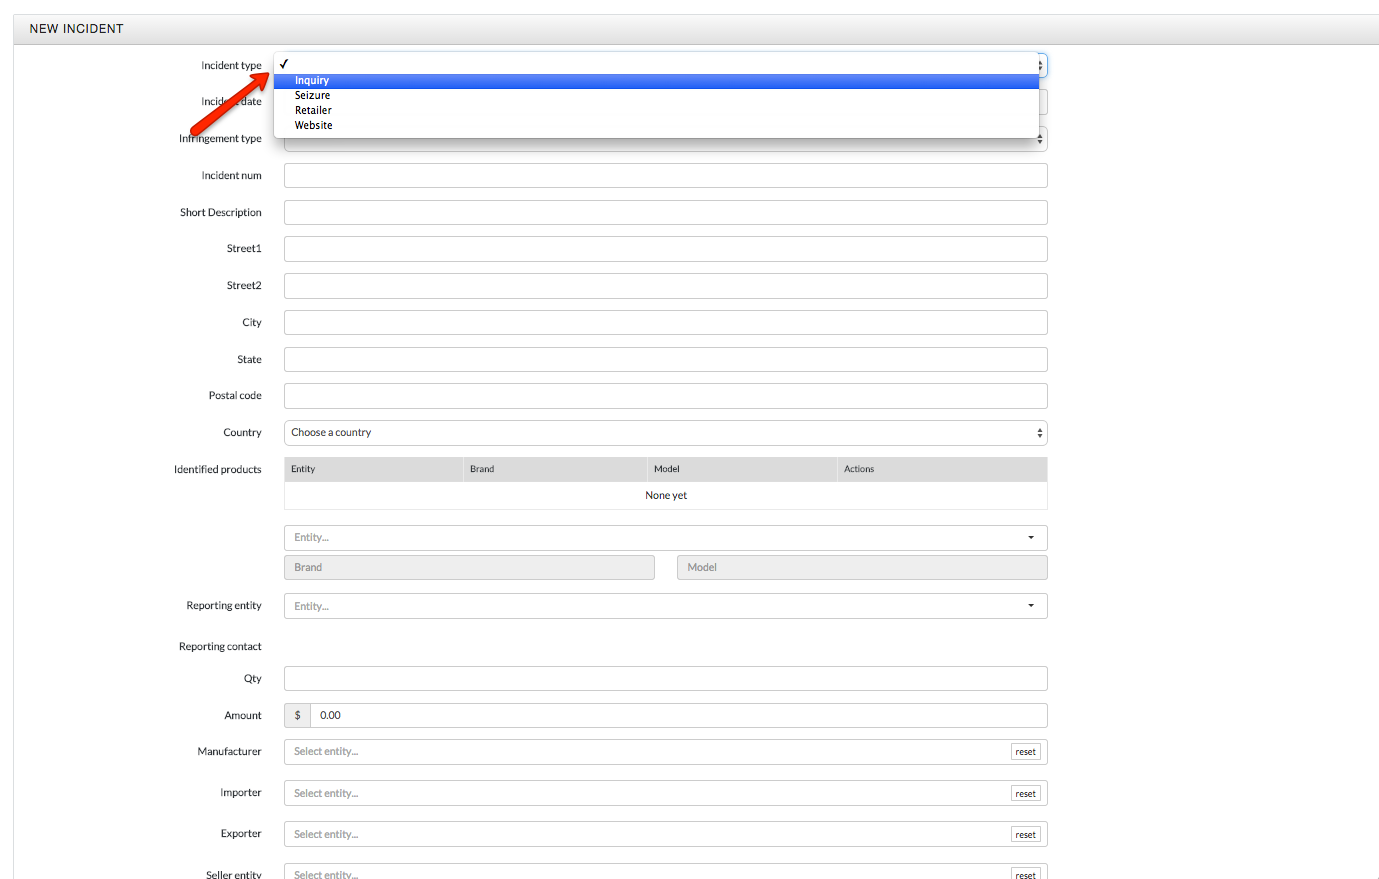
- Select the incident type (Seizure, Inquiry, Retail, Website, POS) to categorize the incident
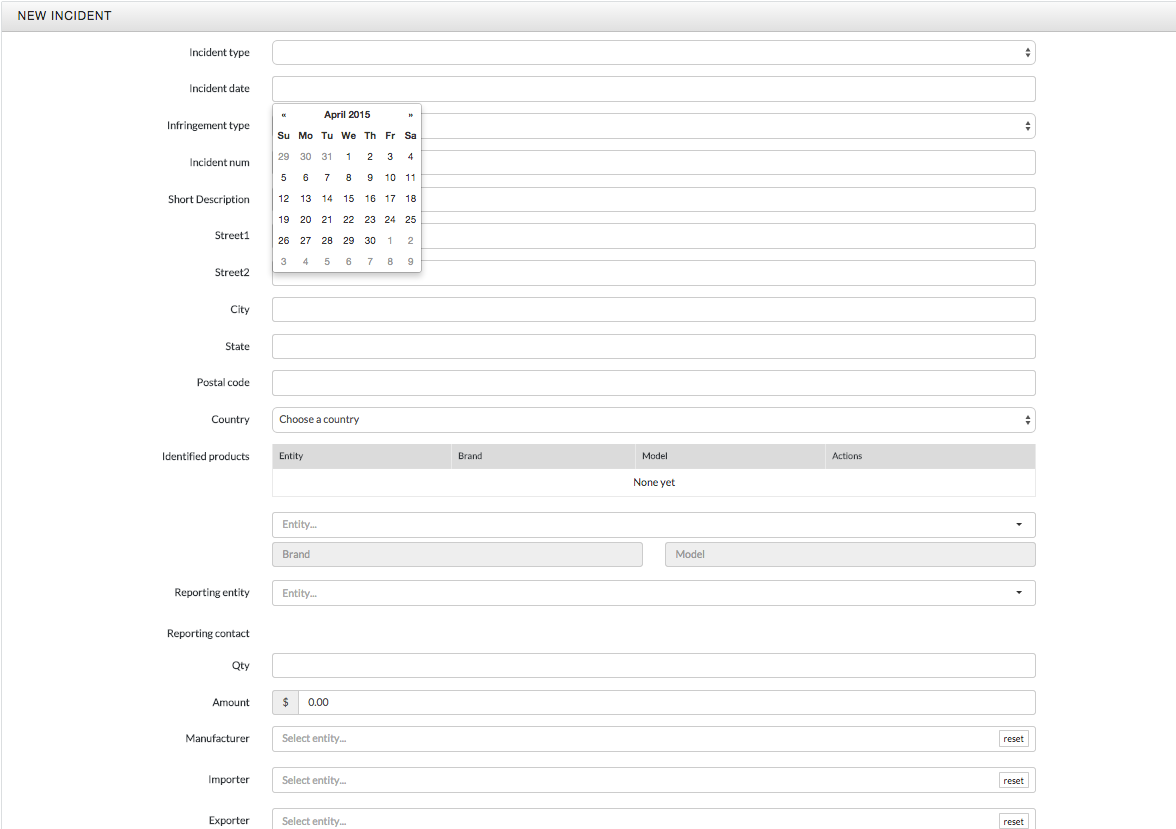
- Select the incident date of when the incident occurred
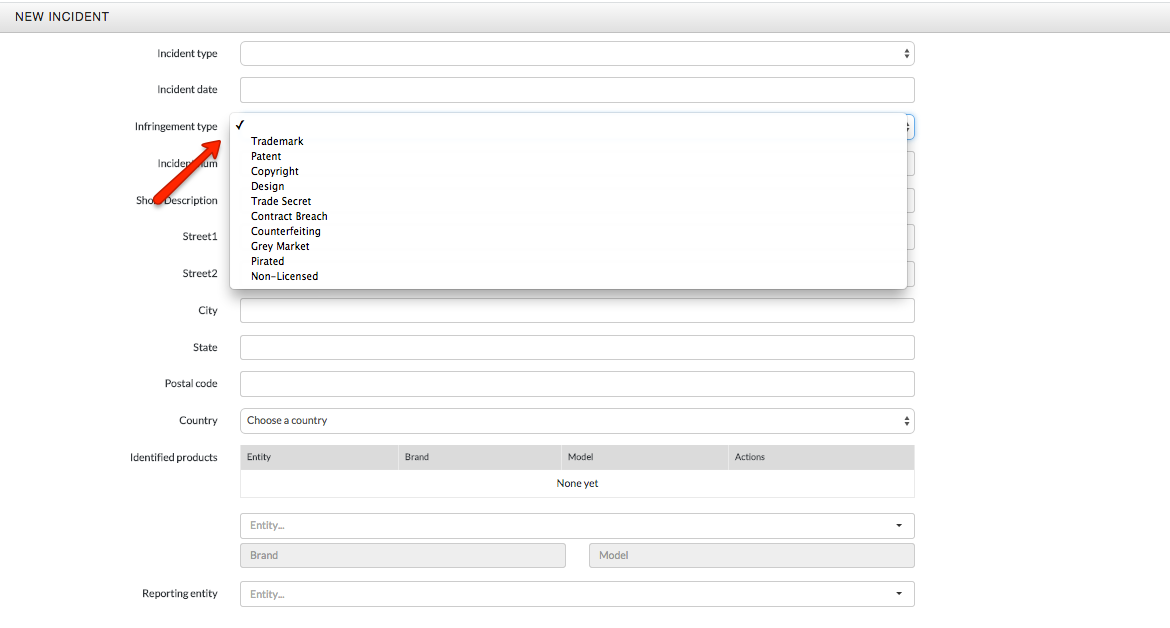
- Select the Infringement Type from the drop down menu
- Enter the Incident Num (this value is a unique identifier related to the incident - i.e. it is recommended to use the seizure notice number or detention/inquiry file number provided by customs.) For the product sightings, you can create your own type of tracking for incidents. This unique number will appear in Associated Incident (see below for details)

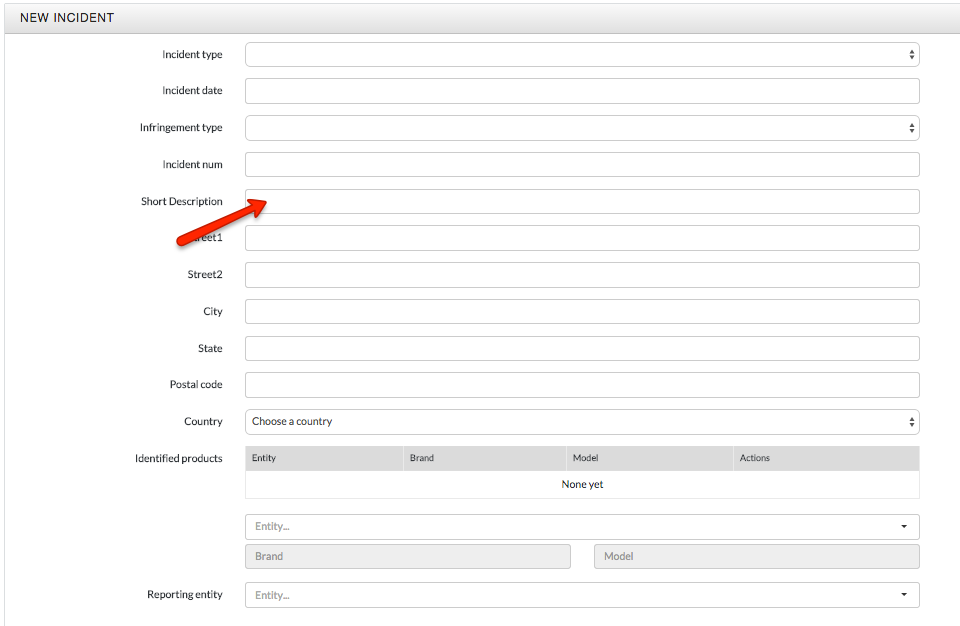
- Add Short Description *limit 255 characters* of the incident. You can add the URL link to the suspect products (for website type of incidents)
- Add address information (location of the incident)
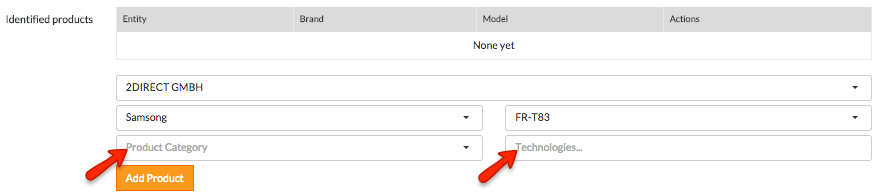
- Add Identified Products by selecting product Entity, Brand, and Model. Once these are populated, Product Category and Technology selection can be made from the drop down menus
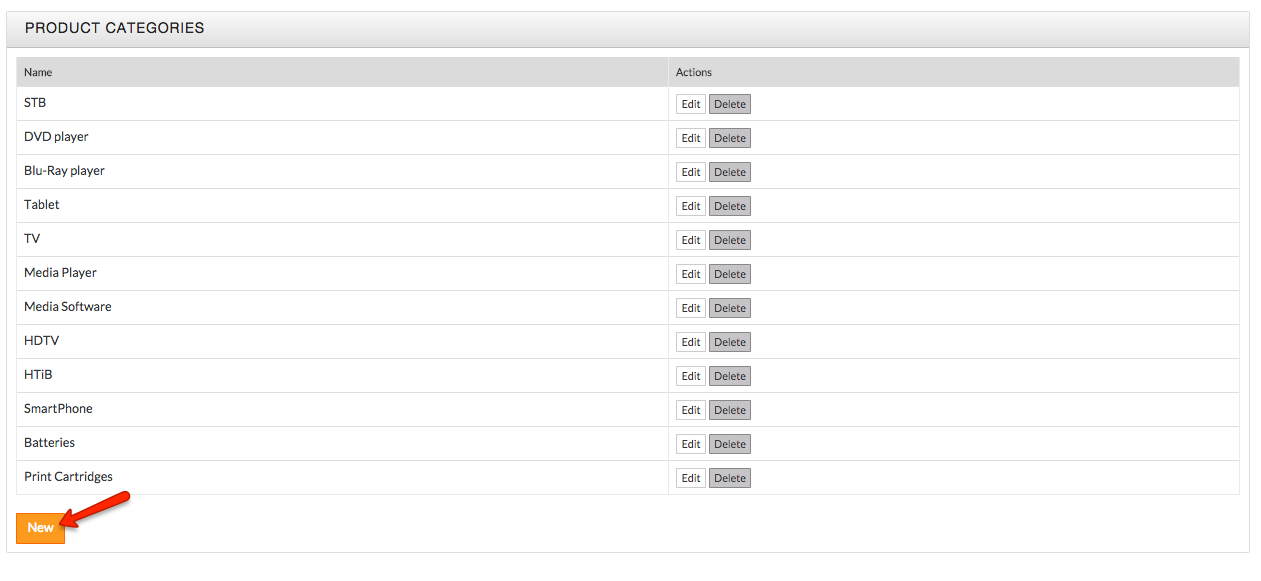
 *Product Category and Technology selections from the drop down list can be configured by clicking System Settings, and can be found under the Product drop down on the left hand navigation pane. Click Category or Technologies and click the orange New button to create new categories or technologies
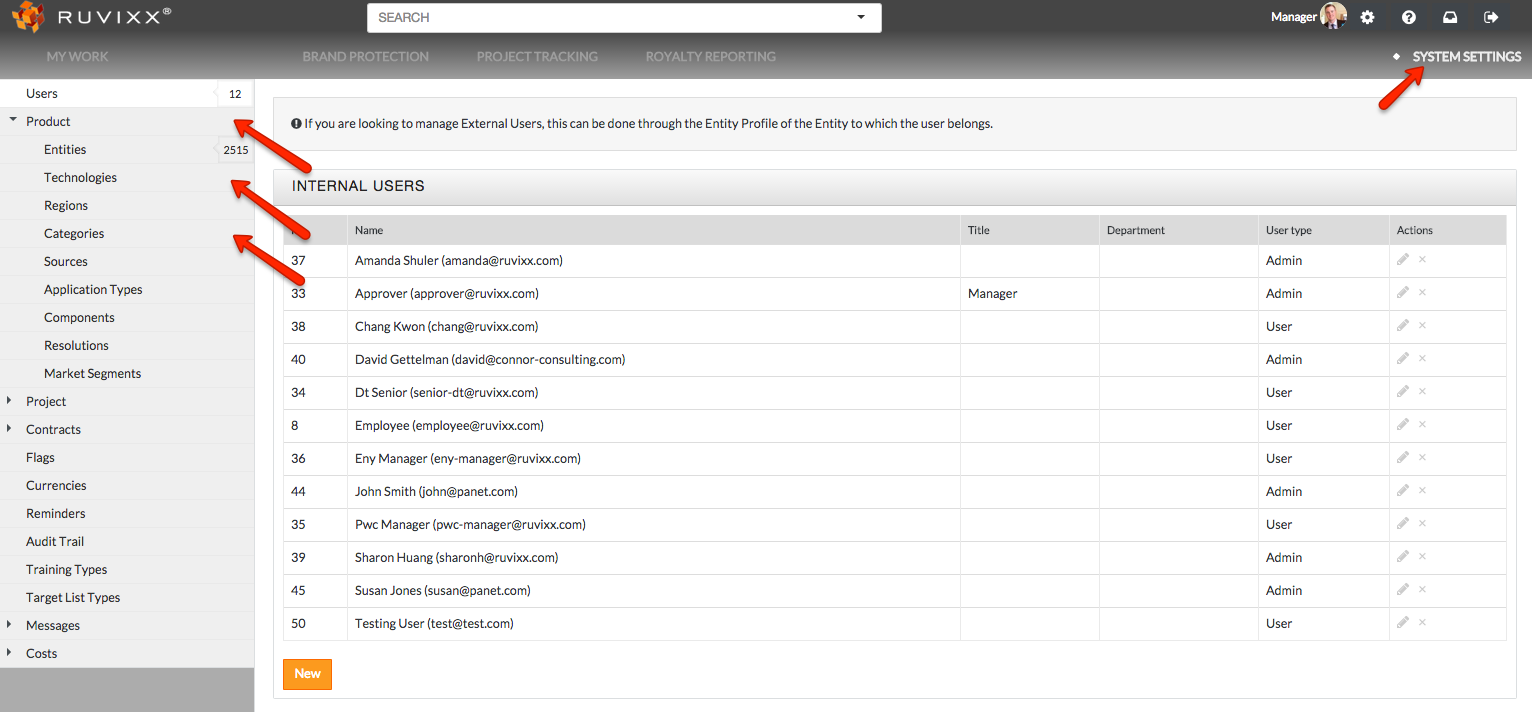
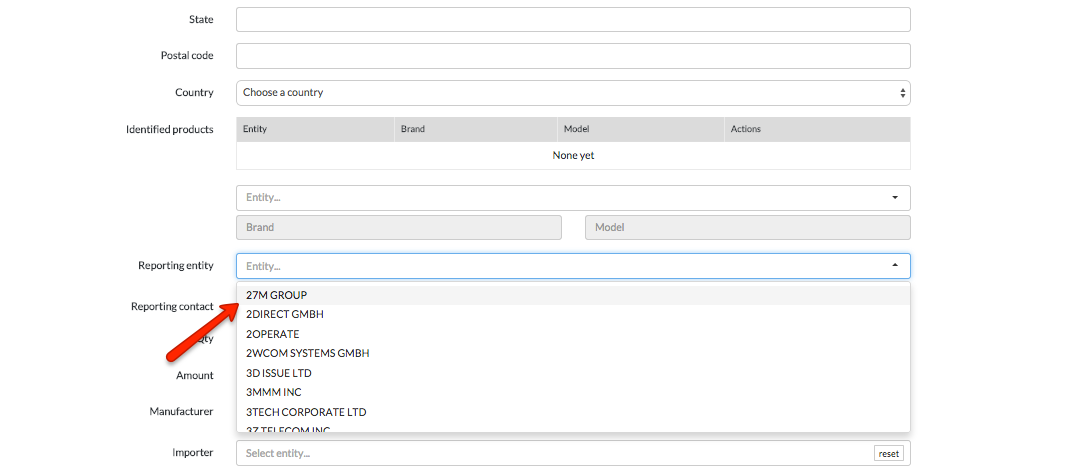
- Add Reporting Entity (entity that reported/identified the incident, i.e. customs port or investigator). *If reporting entity is not available in drop down menu, type reporting entity name and click add
- Enter Reporting Contact information associated with the source of the information in Reporting Entity
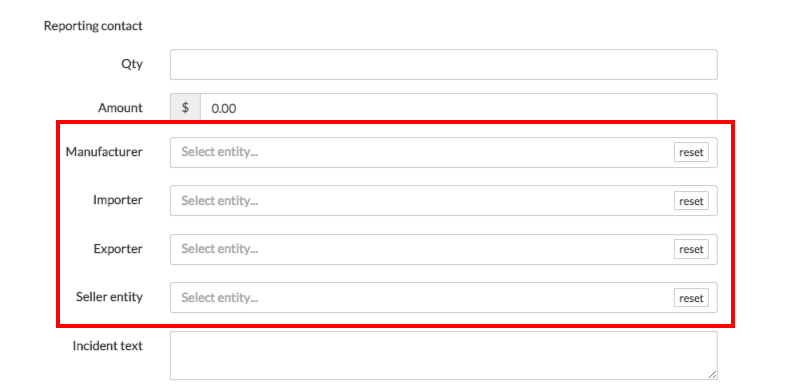
- Enter the total Qty (quantity) of all products in this incident
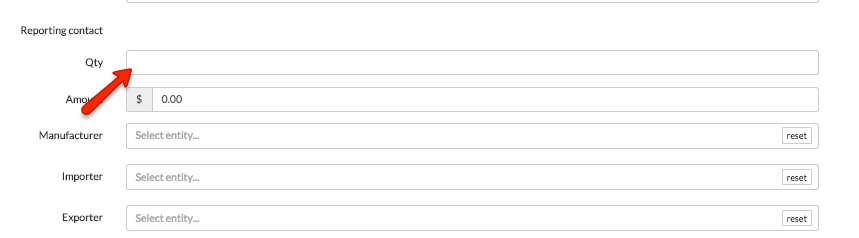
- Enter the total estimated value of all products in the Amount. *total revenue = unit Net or MSRP, or royalty value times the Qty of products. If there are various products, repeat this process for each product and add up. All users must use same type of value when entering amount in order to maintain meaningful analytics from incidents
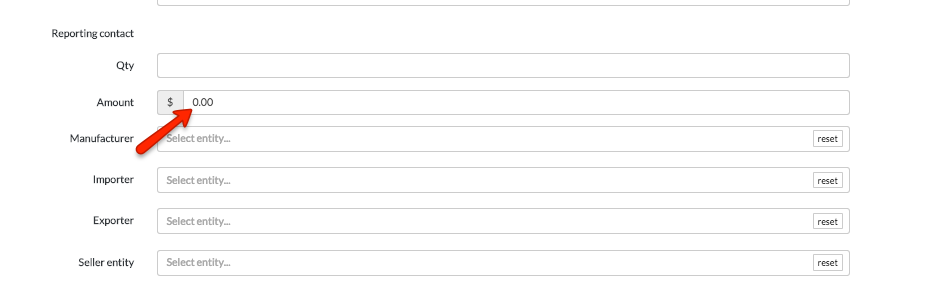
- Enter all appropriate entities associated with the Incident type. For example, seizure may provide all these entities: Manufacturer, Importer, Exporter, and Seller
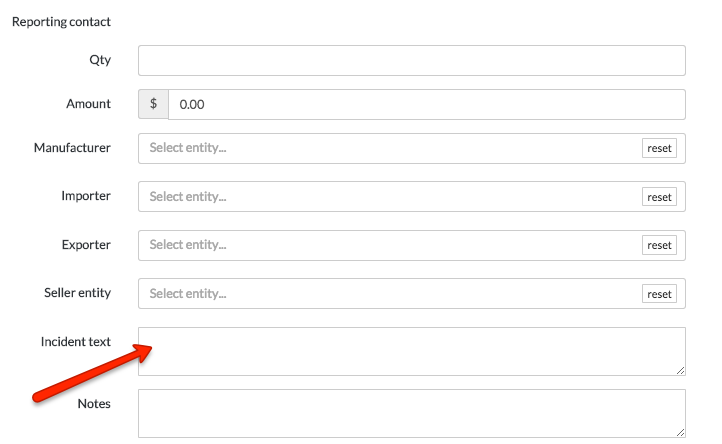
- The Incident Text is designated for entering the “official” text provided by the source of the incident - for example, the seizure notice text provided by Customs, or text provided by investigators, etc
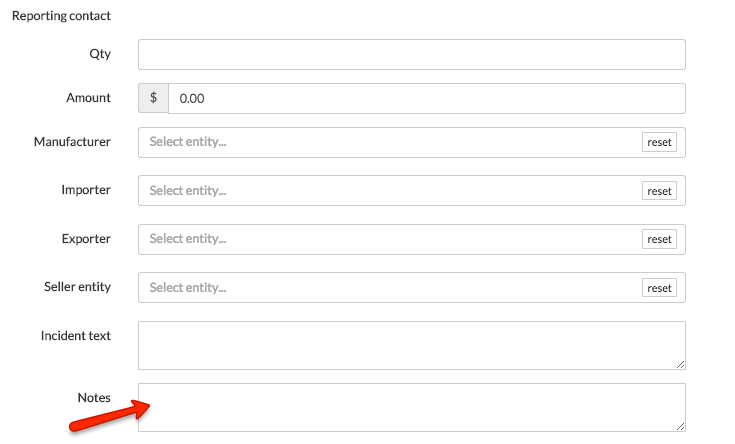
- In Notes, provide any additional details related to the incident
-
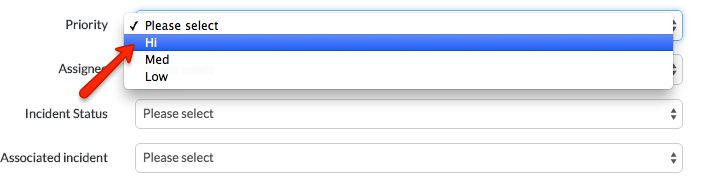
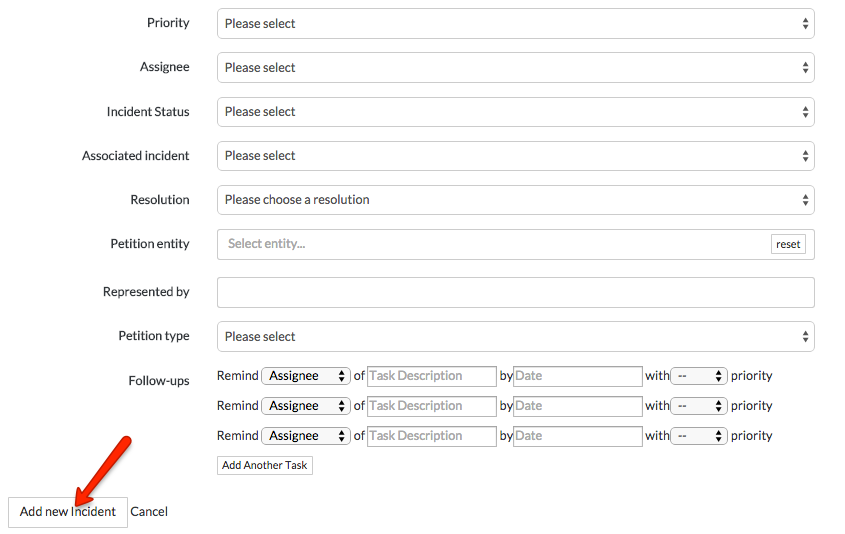
Enter a priority of Hi, Med, or Low. *this signifies the level of importance of the incident
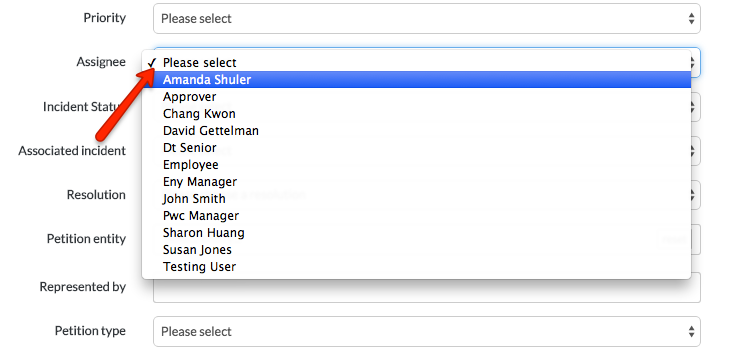
- Enter an Assignee to the incident from the drop down list
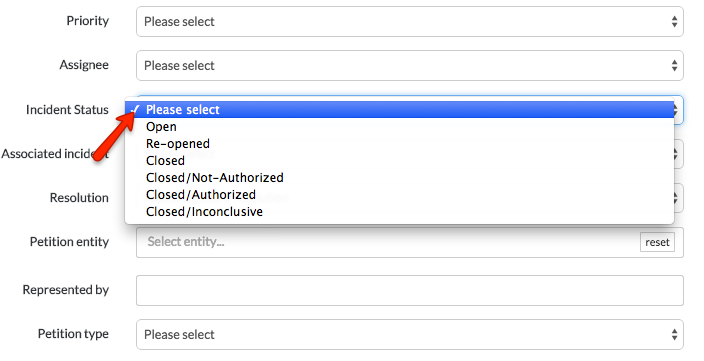
- Add an Incident Status from the drop down list
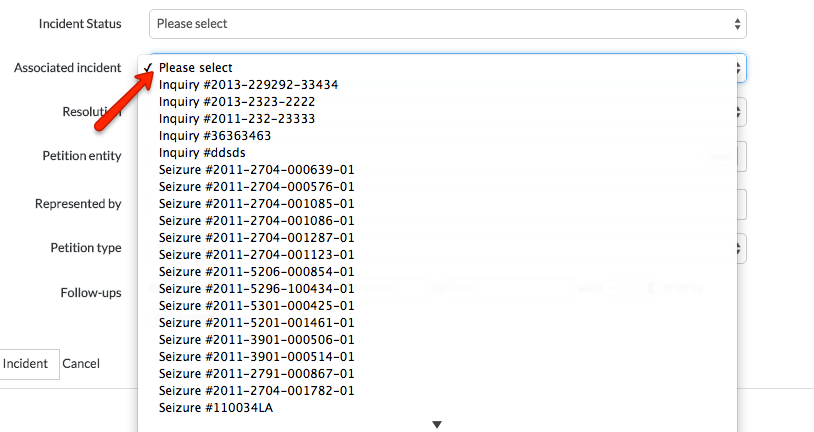
- Input an Associated Incident number from the drop down list *This unique number enables you to show any existing relationships between separate incidents. For example, a seizure may be related to a previously recorded Detention/Inquiry you responded to. In that case, you will provide the associated detention/inquiry number as the Associated Incident when creating new Seizure incident (you can also add this later while editing the incident.)
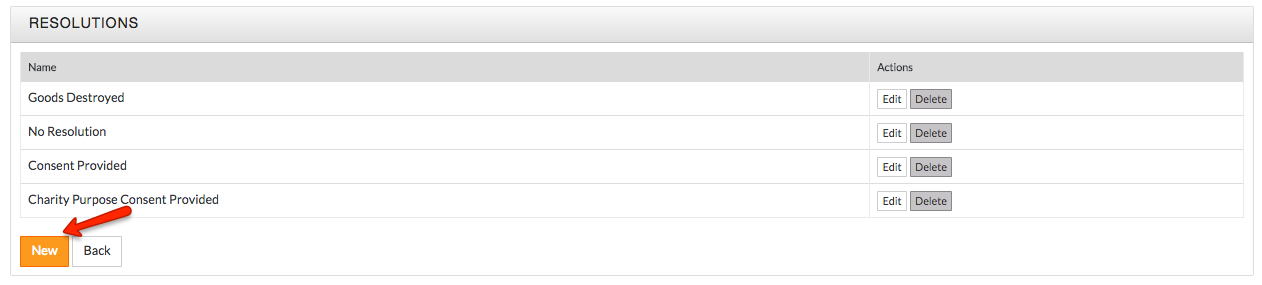
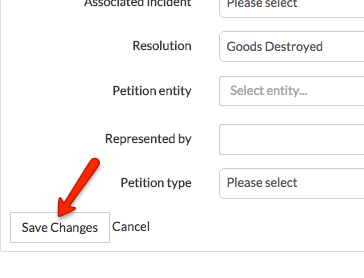
- Select the Resolution from the drop down menu
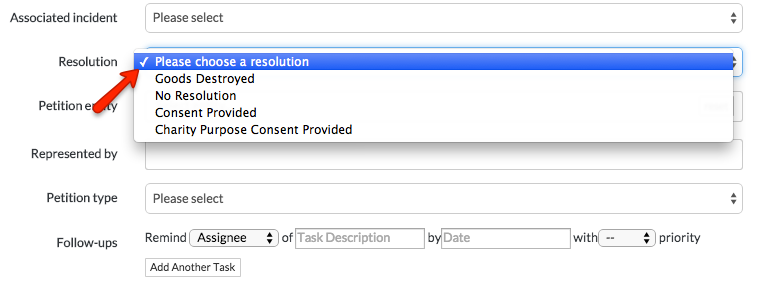 *Resolution selections from the drop down list can be configured by clicking System Settings, and can be found under the Product drop down on the left hand navigation pane. Click on Resolutions and click the orange New button to add new resolutions
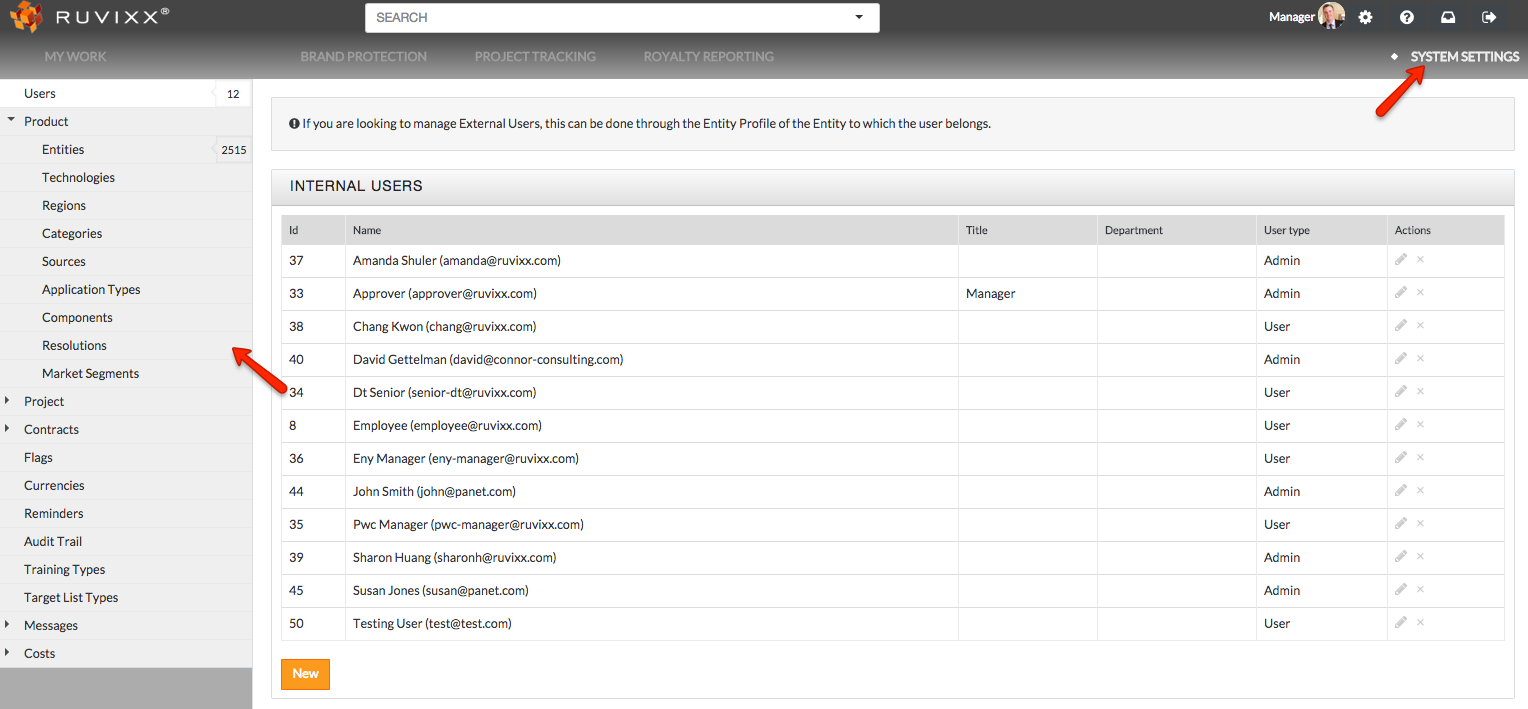
- Enter information to Petition Entity, Represented By, and Petition Type as required

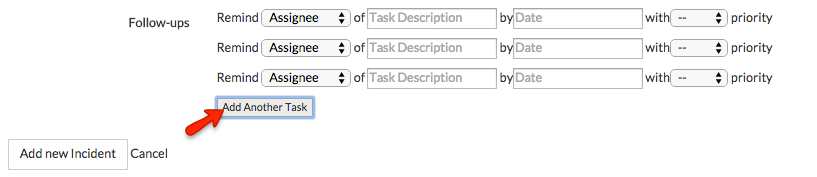
- Enter Follow-ups *add additonal Follow-ups by clicking Add Another Task button as needed. Once incident is created, additional Follow-ups can be added later when visiting by visiting the incident. Please visit "How to Add Follow-ups to Incidents" for step by step instructions

- Click the Add new Incident button on the bottom left of page to save the new incident record
Editing an existing incident can be done in two ways:
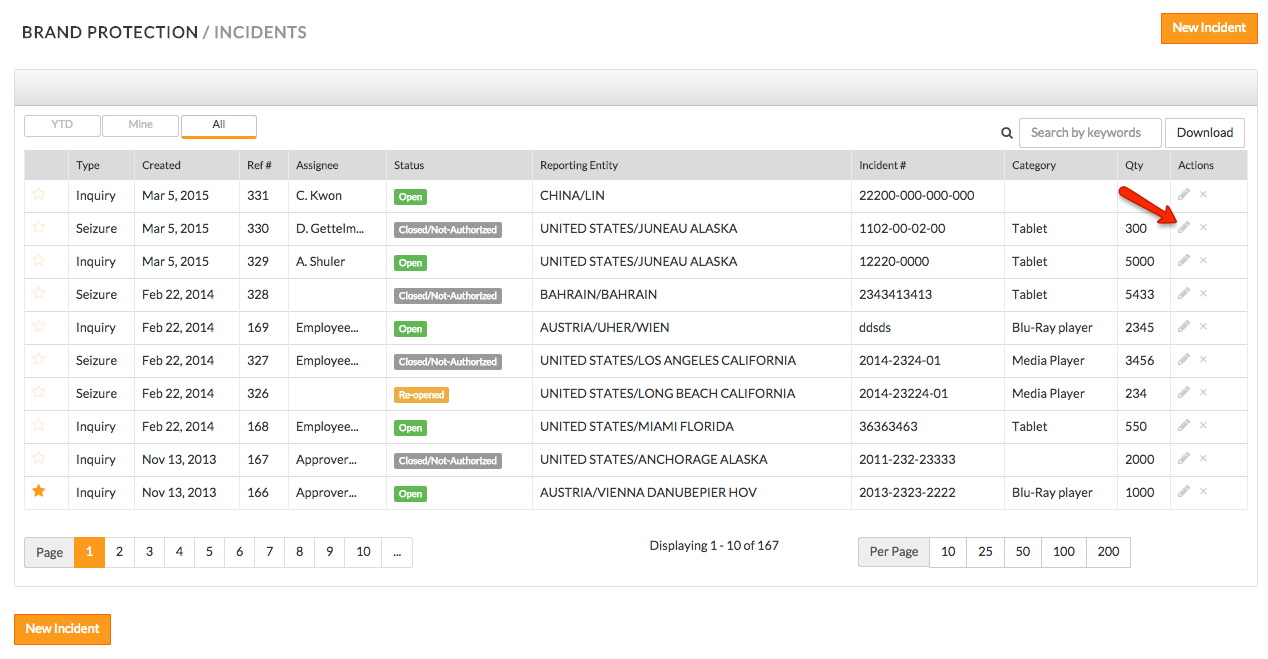
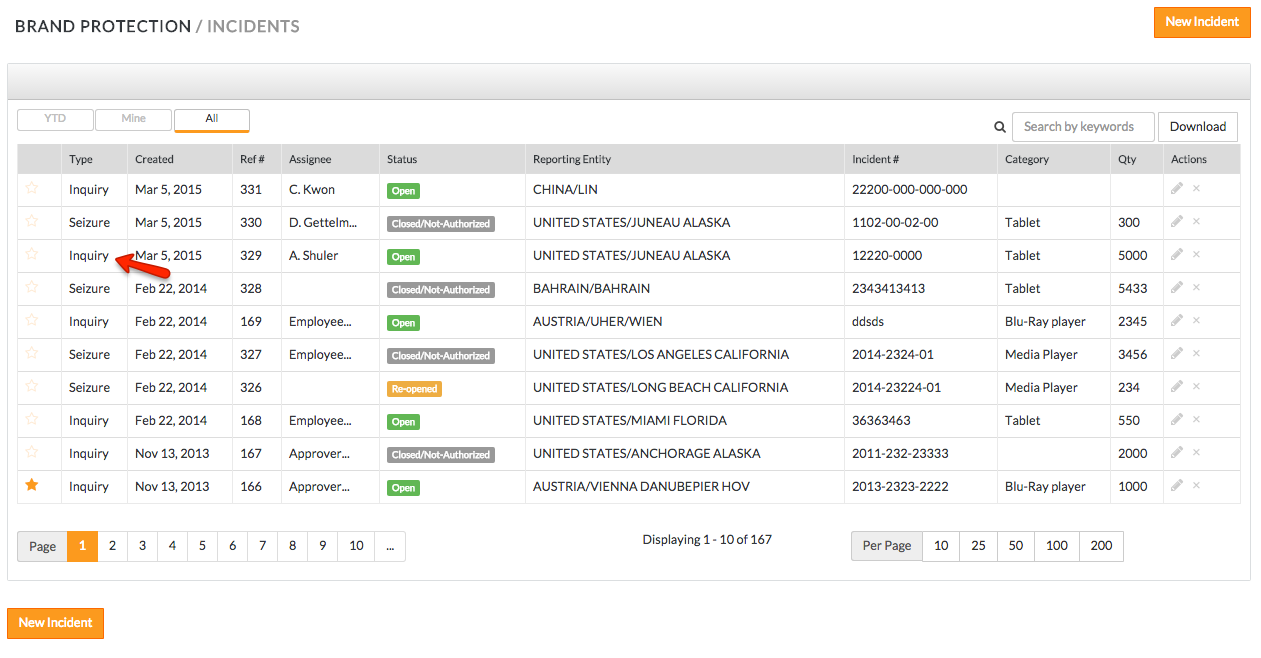
- Click on the edit (pencil icon) button to the right of the associated incident from the incident overview page (incident overview page can be located by clicking Brand Protection button on top navigation pane and then clicking Incidents from the left hand side navigation pane)
- You can also edit an existing incident by clicking on the existing incident record and subsequently clicking Edit at the bottom of the page

- Click Save Changes to save any changes that were made
Comments